Flash Basics
What is flash you ask? Flash is a program designed to create stunning animation and graphics with many different effects. There are many tools in flash to help you start making animations. Before we get to animation which is covered in (tweening) we need to get acquainted with the tools and tool bars we will be using. First, the main tool bar. To see all of the tools in your particular version of flash, just mouse over them and flash will tell you what they are.
Here is a list of the basic tools and what they do.
Some of the tools may vary from version to version. Some of the tools also have special options that we will cover in (drawing).
- The arrow tool allows you to change the outside edges of an object and allows you to select and object.
- The sub select tool allows you to edit the shape of an object. You can change its anchor points and therefore change the object. Anchor points are dots that go around the edge of objects and give the objects there shape. When you move these points, this reshapes the object.
- The line tool allows you to draw straight lines.
- The lasso allows you to select a custom path around or through and object so that you can remove part of an object. You can draw around an object and then move or delete it with the lasso.
- The pen tool allows you to draw a line and then draw a line from your original line allowing you to draw complex shapes.
- The text tool allows you to enter text into your flash movies.
- The oval tool allows you to draw circular objects.
- The rectangle tool allows you to draw rectangles and rectangles with rounded edges.
- The pencil tool allows you to draw free form lines and objects.
- The brush tool allows you to draw freeform segments with a larger colored brush.
- The Ink Bottle tool allows you to alter the line style and size of an object or line when used along with the Strokes Menu.
- The paint bucket tool allows you to fill objects with color.
- The dropper tool allows you to copy a color from and object.
- The eraser tool allows you to remove and object or just remove the objects fill color depending on your selection.
Menus
Now that we have seen the tools, lets take a look at some of the most used tables.
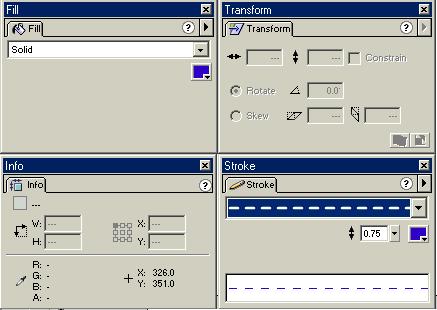
The four menus you see below are usually in one but I have pulled the apart for you to look at.
- The fill menu is where you can select you fill color for your objects.
- The transform menu allows you to change the size and rotation of an object. This will be covered in (tweening)
- The info menu gives you the current size and rotation of an object.
- The stroke menu allows you to change the width and type of line used around your objects. The ink bottle can also be helpful when using this menu.
All four menus below are condensed into one menu with tabs so you can flip back and forth.
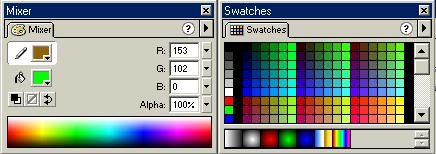
Our next set of menus is the swatches and mixer menu. Again, I have broken it apart for you to see all of its functions.
The mixer menu allows you to pick you colors and your objects Alpha or its brightness.
The swatches menu is a list of common colors for you to choose from.
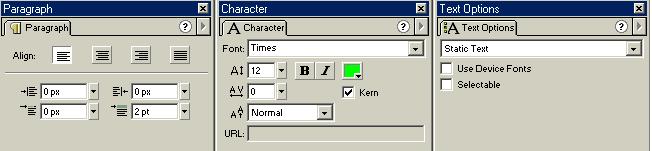
Our next menu is the Paragraph and text menus.
The paragraph menu allows you to choose you text alignment.
The character menu allows you to choose you color, size, font, and special text settings.
The text options menu allows you to edit dynamic text.
The next menu that we will cover h ere is the coolest menu. This menu allows us to make effects, add sounds, and edit frames.
The instance menu allows you to change the behavior of the object. When you make an object a movie symbol, the instance controls what kind of symbol it is. This menu allows you to change the instance of the object.
The effect menu allows you to create animations such as color change, brightness change, Alpha change, and more advanced changes. This menu used with motion tweens can create animated effects in flash. (more on this in tweening.)
The frame menu allows you to change the properties of the frames in your movie.
The sound menu allows you to add and edit sounds in your movie.

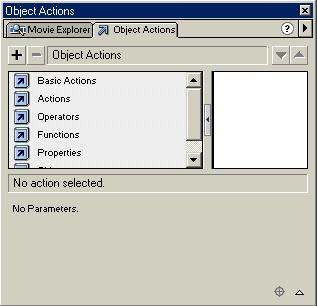
Our next menu is the action script menu. There will be a whole tutorial on this menu but I thought I would show it to you and tell you what it does.
The action menu allows you to choose action for your frames and objects. You can choose from a list of options. This list allows you to do amazing things with your movies. You use this to create preloaders and interactive movies.
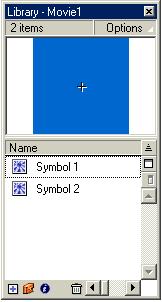
Our last menu is the library menu. This menu shows you all of the objects that you are using as movie symbols. It is very important so you will know what objects you are using in your movies. From this menu, you can create folders of items, create a new symbol, and delete unused symbols.
Now you know the basic menus for flash. I would like to remind you that I have flash 5 so my flash may look different form yours but it is all close to the same. You have seen most of the menus and tools that you will need to create flash movies. I suggest you go to the next tutorial after you understand all of these items.